Some more love from Slovenia arrived in my mailbox not long ago, in it was another BEAUTIFUL brass mold from MP. This one was a re-run of a custom group buy from the cast boolits forum and there were several things that compelled me to get in on this.
One is that it was a round flat nose profile....something that I've learned works well in both my bolt action .357 rifle and the revolvers. The bullets with a shoulder on them such as the 358429 Kieth styles though VERY effective do not consistently feed in my bolt action. The second reason is the weight, this boolit drops as a solid around 190gr and the HP variations are around 183gr depending on what style pin is chosen. This mold came with small and large round pins as well as the popular penta pin so there is some weight variation on the various HP options. The higher weight of this boolit is attractive in both 38 special and 357 Magnum loads which lends much versatility in powder selections as well. Lighter boolits don't perform well with slower burning powders as they exit the bore quickly and don't always allow a complete burn. Something I've learned while experimenting with various barrel lengths ranging from 2" up to 18". Faster powders such as Red Dot and Bullseye can still be used with great success with these heavier options. Even the 230gr 38/357 loads I've tried have used a good dose of Bullseye which has proven to be a exceptionally versatile powder.
The meplat of this new addition of .2800" seems to be the widest that is permissible in my bolt action to reliably feed. Any wider and it would not mate up well with the factory barrel feed "ramp" of sorts worked into the barrel.
With the addition of this mold I feel like I've bridged the gap between the medium weight sport loads and the thunderous steer slaying weight bullets of 230gr etc...the one Keith variation of which does feed well in my bolt action oddly enough. This boolit loaded smartly especially for the carbine should handle any four legged creature North America has to offer. In the case of two legged creatures the 125gr boolit remains a good option for energy transfer and reduced risk of over penetration. A sampling has been cast and about half are lubed and sized and loaded with 2400 in the 357 cases. I'll ladder load some others and see about a wet newspaper test.
Showing posts with label Cast boolits. Show all posts
Monday, December 18, 2017
Tuesday, January 31, 2017
Ruger 77/357, the "Hearing Protection Act" and a job well done.
2016 has come and gone and with it Ruger fans everywhere got a little sad news in mid September that the rim-fire and pistol caliber series of the rugged, reliable and typically Ruger, 77 bolt actions rifles would be temporarily discontinued. For how long who knows....but when I got the news I thought about how much I've been enjoying my 77/357 and was hoping that Ruger would not only continue its production but also come out with a .327 Federal version as well as other pistol caliber bolt actions. Keeping one eye on what companies were starting to bring into production towards the end of 2016 and the other on the political climate that was Bedlam, USA in a presidential election year I asked myself if there was any work I wanted to get done that I didn't feel comfortable doing myself possibly before things got more tumultuous. I thought to my beloved 77/357 and the rumors that the HPA was going to make for another push to pass and remembered researching smiths that specialized in 77 barrel threading jobs.
Barrel prior to front sight set back and threading by JP Grips |
For me I not only wanted my 77 threaded for 1/2x28 but wanted to keep a usable front sight with most of the aesthetics that one gets with Ruger sight bands. These days few rifles have serious iron sights and as such the barrels are easily threaded without regard for the irons sights. Factories have caught on now and ship rifles threaded, such as the Savage Axis and other Ruger bolt actions (among many many others, MVP etc) but few such as the Axis have iron sight options which make aftermarket threading of the muzzle easier for home smiths or mail order places, not having irons to index makes life easier. So these jobs where sights are involved start to get more complicated.
Barrel with thread protector in place |
I recalled seeing a few photos of some other 77 fans who had their rifles threaded and the front sights "set back" and went in search of who they trusted with their guns. Jim Pixley of "JP Grips and Machine" came up time and time again. I emailed a few individuals who had work done and they were all very pleased with his service. I contacted Jim and arranged to have my action sent out right after Thanksgiving, his quote of $175 for threading, a thread protector, sight set back and return shipping was reasonable to me as this was not something that should be done by somebody who thinks this sort of work can be done quickly or with short cuts. Jim's turn around time was quoted as 1 month and he delivered under that time frame. As I'm giving this review prior to having a can on the barrel I can only give my thoughts on how well the job looks, and I think he did a marvelous job, I don't expect the accuracy has been altered at all from how the rifle has performed prior to the threading but only a trip to the range will tell.
Of course the Hearing Protection Act is still being hashed out in D.C. as I'm typing this but I think we have a good chance of seeing it pass. If it does I plan on pursuing a Liberty Mystic X as soon as I can....no pun intended. The Ruger 77/357 is one of the most versatile guns I have ever owned and so far all the little upgrades have made it more enjoyable and more practical for my style of shooting.
I highly recommend if you plan on getting into any "canned goods" if/when HPA passes that you start considering now what you want as hosts. Getting the threading done now will alleviate what I think will be some painful wait times as I can see custom job shops such as JP Grips getting VERY busy in short order as he also works on the Beretta 92, Buckmark's, Remington 597 and all sorts of other flavors of guns. Below is his website and contact info
http://www.jpgrips.com/page1
jpixley@loretel.net
Labels:
Carbine,
Cast boolits,
Cast bullets,
Equipment,
Gunsmithing,
Reloading,
Review,
Rifle,
Ruger 77 .357,
Sights,
Testing
Friday, November 11, 2016
Time for a mihec .308 hunting bullet mold?
A few months back I was offered a 2 cavity .308 rifle mold made by Mp molds (aka mihec) out of Slovenia and I turned it down after a lot of thought. My reasons were simple, "I don't need a hollow point .308 rifle mold...I mean...why?". The thought kept creeping into my head from time to time about getting a .30 cal rifle mold with hollow point options to try but I have been happy with the lee ~150gr FN mold so far I couldn't really justify another ~150gr .30 cal mold. At least until I found myself looking for another Lee 150gr mold to modify for casting hollow points....its at that point I knew I was curious enough about just how versatile a .30 cal hollow pointed rifle mold might be. The ability to cast both a solid and a HP bullet in the same basic bullet design is highly appealing and even more so with such a versatile caliber platform that is the .30 caliber rifle realm. I've yet to modify the lee mold I acquired but that should happen around the holidays as time permits. I did break down and put my name on the wait list for mihec's rerun of his ".308 hunting bullet", wide meplats and big lube grooves appeal to me as they seem to shoot well and feed well through a wide array of firearms. Looking forward to try this out in the bolt action, semi autos and lever action that are currently sitting idle as I'm currently wait-listed to get a membership to a range in my new location.
As I've covered in previous posts, "mihec" makes (imho) possibly the worlds finest bullet molds. With lots of options, quality materials and superb craftsmanship his molds are quickly surpassing the RCBS and lyman molds in a lot of areas serious bullet casters care about. I own several of his "semi custom" molds and as much as I would like to have free product or be paid for my word I was not paid to say any of this. His molds are simply good enough for free props. I look forward to try what will be the 2nd rifle mold of his I'll have purchased in the last 2 years. I've been a customer of his for almost 10 years now and am averaging about a mold a year from him....something to be said about quality, though it does come at a price...it is well worth it in the end for the amount of utility one gets from one of his molds.
Labels:
Cast boolits,
Cast bullets,
Equipment,
Reloading,
Review,
Rifle
Thursday, September 15, 2016
Introduction to the 310 tong tool: part 3
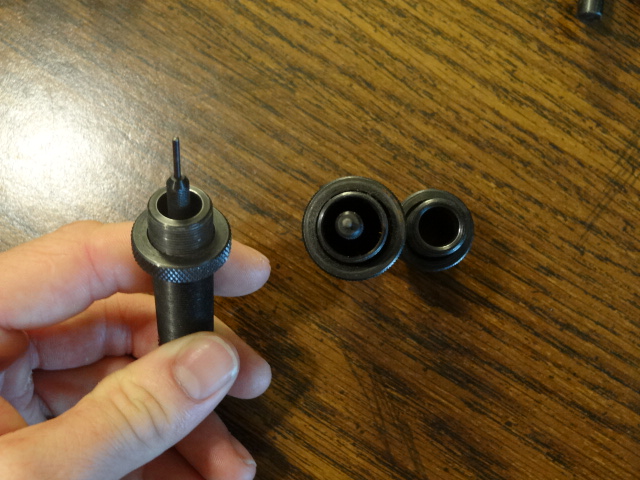
As I may have mentioned in one of the first 2 sections you will want a dedicated screwdriver that fits the set screws for the lock rings on the 310 dies. They are quite small and some can be quite set deep into the lock-ring depending on the era the dies were made, so it is important to have a hollow ground screwdriver (Chapman makes a nice set) that will not damage the screw or the lock-ring itself.
I will go over how to set up a 5 die set, much the same as the 4 die set in the Lyman instructions but with the sizing/decapping die functions separated into 2 dies.
First step is to decap all your fired cases, select the "universal" decap die and adjust it so that the decap pin sticks out past the handles about about 3/16" ..ish. The important thing is the pin pops the primer out and does not bottom out on the brass or hit the opposing handle (broken pin).
The nice thing is if you have 2 sets of handles and 2 universal decap dies you may set one up for both handles and never worry about having to adjust them again. They will work for all of your 5 die sets! If you have 310 PRESS dies I believe you can take the decapping rod assembly out and use them just like a 5 die set.
De-cap pin stick out, you run the risk of breaking the pin if you have it lower than necessary. |
decap brass, note how far the hook extracts the case.
The next step is to size your fired brass. The die for this step in a 5 die set does not have threads on the inside (where a decap stem, seater or expander is typically threaded). A little lube is recommended although I've never used any with my .38/357 pistol set, I can however see the wisdom in the recommendation.
MR die (neck sizing) |
Adjust die until it is sizing the brass as far down as you plan to seat the bullet. |
Die has sized brass as far down as I wish to seat the bullet. Note lower ring on neck |
Next we set up the priming die, if you need to clean your primer pockets now is the time to do that. To set up the priming die we loosen the thumb nut and adjust the die with the handles closed until #1 the plunger sticks up into where the brass sits by a little bit and #2 the open part of the shell holder faces us. Set up the tool to the "handedness" you will be using it. I use mine in my left hand so I set it up as pictured below.
Priming chamber installed and ready to adjust. |
Amount of protrusion we want for the priming plunger with the handles closed. Any more and we will lose the advantage of leverage. |
It is recommended that you practice priming with "dead" primers if this is the first time you have used a hand priming device. Make sure the primer is oriented correctly and gently squeeze, after a few times you will learn the feel of it and know how much pressure to use.
Case being primed, drop a primer atop the plunger and close gently. |
This is the only type of expander die set up that will work with a 310 tong tool |
Die body is threaded in and stem is installed to desired depth, it is recommended to start backed out and turn 1/2 turn in until desired effect is reached. |
If you are getting varying degrees of flare at the case mouth you may be needing to trim your brass as it is not uniform between cases. Trimming options will not be covered here at this time but should be in the not so distant future.
Case in flare die as we are loading cast bullets. |
2 seating stems are shown, as often with die sets the stems are for 2 different nose profiles of bullets. |
Round nose and spitzer type seating stems are pictured. |
Seating die installed in handles adjusted to seat a flat nose cast bullet. |
Though this is a powder-less dummy round for set up it is important to remember that there will be powder in the case and that keeping everything upright to prevent spilled powder is ideal! |
Labels:
Cast boolits,
Cast bullets,
Equipment,
Handgun,
Pistol,
Reloading,
Review,
Revolver,
Testing
Saturday, September 10, 2016
Introduction to the Lyman 310 tong tool: Part 2
In part 1 we looked at the difference and features of the handles that were needed to use the 310 dies. Here in part 2 we see what we need to be looking for in purchasing our tong tool dies either as a group of dies or as individual dies to replace missing dies. As I briefly alluded the 310 dies come in 2 types, dies intended to be used with the reloading press and dies meant for the tong tools. It should also be understood that by design the 310 dies are meant to only neck size! There are some full length sizing options out there but those are for the press only. This is fine for bolt actions, single shots and lever actions however most semi auto guns will not like ammo made that have only been neck sized. The die sets you will need for tong tools need to have a "M" type expander, if you have a die set that has the expander AND the decapper in the same die you may run into troubles.
Four die sets have the neck sizer and the decapper in the same die (seen in following pictures). This is fine as it is only the sets that decap and bell or have the button sizer that is drawn back through the neck that you will need to avoid. It is because the hook does not stay engaged with the case long enough to pull it back over that expander. As such either of the die sets pictured above are suitable for the tong tools.
Something to note in the above picture the "Universal" type decapping die assembly is one give away you may be looking at a 5 die set for the tong tool. Most die sets for use in the reloading press set ups will have a skinny stem with a button part way up the stem, note the fatter threaded rod in the "universal" decap die.
In the pictures below we start to take a look at the expander dies as another way to identify die sets for use with the 310 tong tool. If the die set you are looking at combines these two operations into one die it is not for the tong tool but for the press.
In the next picture we see the decap, sizing and expanding operation combined all into one die. This die as is will not work with the tong tool handles. You could remove the expander button however you'll still need a way to expand the case mouth.
Another clue you might be looking at a 310 tong tool die set is the priming unit that has a built in shell holder and captive plunger assembly but it is not a absolute as this was something that could also be used on the press. The bullet seater die (double adjustment) is the same so far as I understand it between the press dies and the tong toll type dies. I mentioned the bullet seater as having double adjustments because the stem is threaded as well. I have yet to see a non adjustable type bullet seater however I'm sure they are out there.
This may seem confusing at first (I sure was) but it is worth understanding if your wanting to build a reloading set up that takes up very little space and is easy to use. The 310 tong tool is still a relevant system perfect for the RV or cabin. In the next part we will go over die adjustments and set up for reloading.
L- 4 die set, R-5 die set |
Four die sets have the neck sizer and the decapper in the same die (seen in following pictures). This is fine as it is only the sets that decap and bell or have the button sizer that is drawn back through the neck that you will need to avoid. It is because the hook does not stay engaged with the case long enough to pull it back over that expander. As such either of the die sets pictured above are suitable for the tong tools.
Aforementioned hook shows just how far it will extract a 30/06 case before it disengages. |
4 die set, note left die is both decapper and neck sizer as opposed to being 2 dies in 5 die sets |
5 die sets, The "Universal" type decapping die and then the "muzzle resizer" which is the neck sizer are the left most 2 dies. |
Another view of decap/sizer die from 4 die set and the 2 dies that perform the same operation from 5 die set. |
Here we see the "universal" decap stems from 2 rifle die sets as well as the "M" type expander die. |
These expander dies were taking from 3 different sets, 30/06, 30-30 and 357. Note die body length difference between the three. |
Close up of expander die body and stem from 30-30 die set. |
This die intended for the 310 series of bench presses WILL NOT work for our tong tool handles! |
Left-310 dies for expanding case mouth and decapping. R- die for the press that combines these operations. |
Differences in stem sizes, Also note on right die "CMR" stamp that denotes this as a "combination muzzle re-sizer die" |
Priming unit shown as 2nd die from left and double adjustable bullet seating die shown far right |
This may seem confusing at first (I sure was) but it is worth understanding if your wanting to build a reloading set up that takes up very little space and is easy to use. The 310 tong tool is still a relevant system perfect for the RV or cabin. In the next part we will go over die adjustments and set up for reloading.
Labels:
Cast boolits,
Cast bullets,
Equipment,
Handgun,
Pistol,
Reloading,
Revolver,
Rifle
Friday, September 9, 2016
Introduction to the Lyman 310 tong tool: Part 1
Last June I wrote an article on making a simple powder dipper for a "project" and it wasn't until recently I realized that I never explained the project further. This last year I've been living in a very small space while preparing to move yet again. The project was a complete reloading set up I could fit in a small tool box, I had reviewed a lee whack-a-mole type reloader and this was indeed one option for such a set up however... The room I was staying in was in a house with about 10 other people. The whack-a-mole was not going to work (hint it makes a lot of noise unless you have a heavy block to use under it). The next option I had I came across by accident. Lyman 310 tong tools...something I've seen but never really looked into. I happened to obtain a set of the tongs with a few dies from an estate purchase I had made earlier in the year. I liked the theory behind the tool and thought it would work out very well for what I had in mind. The room I was staying in was about 10'x6' give or take so not even a true reloading bench was possible. I did however have a small computer desk as a multi function surface...dining table, reloading bench, computer desk, writing desk etc. This gave me enough space for a powder scale, reloading block and misc accessories.
The 310 tool gets its model number from the combination of the "Ideal #3" tool and the "Ideal #10" tool. I am not going to present much info on the rarity or collectible value of the plethora of iterations these types tools have had since their inception rather this is meant to be a practical introduction to somebody who wants to get one of these unique loading tools for themselves. And some things to watch out for along the road to building your micro reloading kit. Note if you are looking at a die set to purchase you may want to skip to part 2 to gain a understanding of what to look for in purchasing your 310 tong tool dies.
#1.Handles a.k.a tongs, pliers, nutcrackers.....
Two types of "modern" 310 tongs. Large/rifle type on the left, small/pistol type on the right. |
First you will need to decide what caliber you will be reloading for as your handle selection will be based on this. Above you can see the Lyman 310 large handle (left) and small handle (right). I desired to load .38spl and .357 magnum so a small handle is what the dies I were to be using required. The handles themselves have some important features that make it a truly versatile tool in it of itself.
First feature you might notice is the shell hook, this spring loaded hook acts as an extractor pulling cases out of the dies once you've performed the desired step (bullet seating, decapping, belling, etc.). The hook is adjustable for engagement using the adjusting screw on the other side of the grip. You will need to tune the hook for proper engagement as too much may scrape and damage brass and too little will slip off the case rims.
Side view of hook and adjustment screw |
Loosen nut, adjust as needed, tighten nut. |
The next feature you will notice is the where the case is inserted for the various operations. There should be a ring present on any "complete" die set you purchase for tong tool use. These rings are the "shell adapters" each one is stamped with a number that correlates with a cartridge, below we see #1 which is for my beloved 38/357 as well as the #2 which is for 30/06 and 45ACP type cases.
#2 adapter for 30/06, .243, 45acp etc. |
Side view of shell adapter needed for tong tools |
Threaded shell adapters help align the cartridge cases ensuring accurate introduction to the dies. |
It is important to note that 310 reloading dies come in 2 types, the tong tool type that can be used with the aforementioned type handles and the reloading press type. The reloading press dies can not be used with the tool handles successfully, you will run into problems. The biggest issue is with the combination re-sizer die or CMR marked die. More info on this issue will be covered in part 2.
Labels:
Cast boolits,
Cast bullets,
Equipment,
Pistol,
Reloading,
Revolver,
Rifle
Sunday, December 27, 2015
Intro to Group buy / custom bullet molds : or : The NOE 360432 a variation on the Lyman 358432 wadcutter a classic revival.
We are pretty spoiled in the handloading and bullet casting communities these days. Whatever we seem to dream up a need or want is made by some industrious individual or company. Need a faster way to make brass for your .300 blackout...bam somebody makes a jig to use in a tiny saw that cuts necks off of cases 10 times faster than a traditional tubing cutter takes to do 1. New ideas are always coming out as the market is in a constant state of flux. Sometimes however its not a new thing that gets us all excited but a revival of a previously "obsolete" product or design especially in cast boolits can get us really going. A number of bullet mold companies are making limited runs of molds that were once a stocked item by RCBS, lyman, Hensly & Gibbs or what have you. Once in awhile certain designs of cast bullets fall out of fashion for one reason or another after some time, new caliber comes along and bumps it off or something along those lines. Some old timers post some pictures of these hard to find bullet molds, their product and the results on paper and game and us younger guys start drooling, then fight for the few that show up on ebay like it was for the honor of a woman.
There are a good number of companies out there willing to produce whatever bullet mold we seem to dream up within reason. So far the only two I have had the pleasure to obtain molds from have been N.O.E. Bullet molds here in the US and MP- Molds located in Europe. Both companies make molds that are flat out works of art. I will post a overview of one of MP (a.k.a.-mihec on the castboolits forum) molds sometime in the near future as time allows.
One recent limited production run of a semi custom was commissioned by a fellow who wished to see a multi cavity mold made to readily produce a hollow pointed version of Lymans old 358432 type III wadcutter bullet. A number of molds had to be spoken for before the tapped company (NOE) would order the tooling and begin production. After all it does cost money to produce these items and the company needs to recoup their tooling and set up costs so a modest minimum number of molds spoken for ahead of time is common. This route for a custom mold is cheaper and the product lasts longer than some other mold options that are out there for custom cut molds. The catch here is its a "group buy" format.
The process is not fast, it takes a certain amount of patience to get through one of these "group buys" as they are called. But there is little to no regret when the mold you have been yearning for finally shows up at your door. As I continue to develop loads and mess with various bullet designs for .38 spl and .357 mag I must say that this particular hollow pointed version of a wadcutter caught my attention. I already have a 4 cavity mold that produces excellent solid bullets around 160gr in weight. These are solid thumpers and I have no doubt they would be just fine for deer or other small to midsize game at reasonable distances but when the opportunity to try a hollow point mold came about I jumped on.
Specifically I was looking at getting a bullet mold that would offer greater versatility than the 4 banger I had that could only make solids. I sprung for the 2 cavity mold, it came with pins to make a deep hollow point, a shallow hollow point and a "flat" which is just the same as the solid that I already have. A short time after the mold arrived I had a good size sample lot cast up of the large hollow point version. Sized a lubricated with Carnuba red I loaded up test batches in .357 magnum and even more in .38 special. Pistol results were promising but more work will need to be done for the rifle loads as they were producing some erratic patterns.
The various pin sizes obviously alter the weight of the bullet, the large hollow point pins bring the bullet in at around 148-150 grains. Not a heavy weight really but when you look at how a type III wadcutter is designed so that a portion of the nose sits above the case mouth your load options change a little over just the standard 148gr wadcutters.
Mold as it ships in a padded envelope. |
Add caption |
The pins are retained by a tab on the bottom of the mold. Upon opening the mold the bullets fall right off the pins almost easier than a traditional mold. |
Various pin options are available and if one is handy on lathe many more can be fabricated. |
Monday, July 13, 2015
More .38 special .357 Magnum wet pack tests
What was supposed to be another weekend full of shooting matches turned out to be half a weekend of shooting matches and half range work as the rain here in NW Ohio has made a lake out of the range we were going to be shooting 3 gun at so I helped at our home range with a work day. Made up another block of phone books to soak over night and thought I would test some more .38/357 bullets as well as .500 S&W and a 30/30 cast load.
First off all the .500 S&W factory loads kept veering off course inside the books and blowing out the sides. got one really good mushroom. Did not penetrate as much as you would think but expansion helped it slow way down and leave a large cavity in its wake.
Next I wanted to test a 173gr keith bullet coming out of my carbine at a unknown velocity (greater than 1100fps though) the bullet performed very well, penetrating far into the stack of wet phone books, well over a foot and a half. The re-swagged jacketed bullet shown at right below did not deform at all surprisingly. This bullet was experimental and will not be used for anything other than plinking.
Last I wanted to see how my 30-30 loads with 34gr of Reloader 15 and a Lee cast flat nose 150gr bullet performed out of my newly rebuilt 94. at this point I had pulled the phone books apart to recover previous pistol shots so sucessive bullets wouldn't damage future specimens. I had about 20" of good phone books left and well....it wasn't enough, my 30-30 loads blitzed right through the whole stack as if it were butter. Sooo I will revisit that particular test next time I head to the range with wet pack and test more bullets. The more I learn about bullet performance and design the more I see how gimmicky some of these bullets being offered by the big companies really are. Dead is dead.....can't make anything more dead. And a good shot can do a lot with any bullet, a bad shot will just piss off an animal with a top of the line bullet if not placed correctly.
First off all the .500 S&W factory loads kept veering off course inside the books and blowing out the sides. got one really good mushroom. Did not penetrate as much as you would think but expansion helped it slow way down and leave a large cavity in its wake.
Factory Hornady .500 S&W bullets (350gr starting I believe) |
Next I wanted to test some souped up .357 hallow point loads I've touched on in a previous post. 125gr cast HP bullet exiting a carbine bullet going ~2000fps. I didn't think the bullet would hold up but it did and retained all its weight!
2000 fps loads flanking the slower .38 special load I covered in a previous post. Same bullet. |
Top view of souped up .357 magnum 125gr load. |
R:124 gr 9mm swagged to .357 fired into wetpack shows no deformation, C: 173gr keith fired into wet pack R: unfired Keith. |
Last I wanted to see how my 30-30 loads with 34gr of Reloader 15 and a Lee cast flat nose 150gr bullet performed out of my newly rebuilt 94. at this point I had pulled the phone books apart to recover previous pistol shots so sucessive bullets wouldn't damage future specimens. I had about 20" of good phone books left and well....it wasn't enough, my 30-30 loads blitzed right through the whole stack as if it were butter. Sooo I will revisit that particular test next time I head to the range with wet pack and test more bullets. The more I learn about bullet performance and design the more I see how gimmicky some of these bullets being offered by the big companies really are. Dead is dead.....can't make anything more dead. And a good shot can do a lot with any bullet, a bad shot will just piss off an animal with a top of the line bullet if not placed correctly.
Subscribe to:
Posts (Atom)