Showing posts with label Revolver. Show all posts

Tuesday, April 2, 2019

Testing testing 1....2....3......: or : spare parts and trial by fire

Most of us know what to expect if we bring someone to the range that is a "Joe 6 pack" and maybe box of ammo a year kind of guy (or gal) and they bring that AR-15 or Mini-14 or XD they got during a panic ( just in case) and kept it locked in the closet with a few boxes of ammo and magazines still new in the wrap. We know that things are not going to go how "Joe" expects them to, ie everything running smoothly and no issues arising with their choice of equipment. Even well vetted and tested product lines have examples with issues that can be debilitating for the platform....  After you covered or reminded them of all the safety rules and how to use their particular gun and they start with one round in the magazine (then 2 or 3....just to be sure they are comfortable with the trigger and competent with their muzzle control) you move on to full magazines....this is where things can start to get interesting. Guns heat up....things start to vibrate loose or the simple process of sighting in the gun for the first time can uncover some ugly shortcomings of the chosen platform. Case in point we see below a borrowed example of very popular choice of rifle, zeroed for the first time since its production (presumably) and not one but BOTH of the set screws for the rear sight broke at the head with what was a appropriately sized screwdriver and amount of torque. This is something you want to uncover on the range and not anywhere else....gain confidence in your equipment before hand. Don't expect to get the same results in performance and reliability that you read about in that glossy magazine review of the firearm (or any other equipment).


Insult to injury...the locking wedge loosened up and allowed the rear sight to walk out on us....done for the day with the MINI-14. I believe the owner will be replacing the factory rear sight with a Tech-sight brand rear sight for better durability and utility.


Factories make mistakes, This one shown below is a interesting one, you will notice the hole on the barrel furthest to the top of the picture has a very thin white line shinning in the middle of it. This is indeed light shinning through a hole in the barrel. The factory not only drilled the hole off center (the lower hole was one I drilled top dead center so the iron sights could actually be used)  they also drilled the hole too deep and broke through into the bore enough to cause a gas port where one was not desired. I noticed this after running about 300 rounds through this particular .22 LR and saw powder deposits emanating from under the front sight. Since I had done some other custom work to the barrel and already fixed the factory off center sight I doubted the factory would be replacing my barrel for me. .22 LR being fairly forgiving I decided to clean the hole as best I could, degrease and use JB weld (Acraglas would be a excellent choice as well) to fill in the hole completely. Using a cotton patch with release agent stuffed in the bore I was not worried about JB weld going through the crack ( I doubted it was viscous enough anyways) and mucking up the bore. When the epoxy was cured and I removed the patch I was pleased to see a very clean surface in the bore where the flaw had been. This was an issue that was easily repaired with little hassle and did not harm the accuracy of the rifle in any way,  If I had solicited a fix from the manufacturer it would have at the very least cost me shipping and insurance one way I'm sure.


My point is you only know your equipment works correctly and as designed if you take it out and put it to work. Sometimes the materials used in your specific example are flawed causing a failure of the system to perform as intended. Sometimes the factory (even reputable names) have QC issues and allow lemons to leave the facility  and it sucks to be the unsuspecting customer about to put down hard earned money for a learning experience....to quote my dad though. "You paid tuition...now you're smarter".

1. Get spare parts for the stuff you know that will break.
2. Get spare parts for the stuff you think might break.
3. Get out and train, compete, practice, rinse and repeat with your equipment so you gain experience and confidence with your chosen platform. If your instagram followers only like to see clean gear you need new followers.


Monday, December 18, 2017

MP 358-180 mold, possibly the best one yet!

Some more love from Slovenia arrived in my mailbox not long ago, in it was another BEAUTIFUL brass mold from MP. This one was a re-run of a  custom group buy from the cast boolits forum and there were several things that compelled me to get in on this.


One is that it was a round flat nose profile....something that I've learned works well in both my bolt action .357 rifle and the revolvers. The bullets with a shoulder on them such as the 358429 Kieth styles though VERY effective do not consistently feed in my bolt action. The second reason is the weight, this boolit drops as a solid around 190gr and the HP variations are around 183gr depending on what style pin is chosen. This mold came with small and large round pins as well as the popular penta pin so there is some weight variation on the various HP options.  The higher weight of this boolit is attractive in both 38 special and 357 Magnum loads which lends much versatility in powder selections as well. Lighter boolits don't perform well with slower burning powders as they exit the bore quickly and don't always allow a complete burn. Something I've learned while experimenting with various barrel lengths ranging from 2" up to 18". Faster powders such as Red Dot and Bullseye can still be used with great success with these heavier options. Even the 230gr 38/357 loads I've tried have used a good dose of Bullseye which has proven to be a exceptionally versatile powder.

The meplat of this new addition of .2800" seems to be the widest that is permissible in my bolt action to reliably feed. Any wider and it would not mate up well with the factory barrel feed "ramp" of sorts worked into the barrel.

With the addition of this mold I feel like I've bridged the gap between the medium weight sport loads and the thunderous steer slaying weight bullets of 230gr etc...the one Keith variation of which does feed well in my bolt action oddly enough. This boolit loaded smartly especially for the carbine should handle any four legged creature North America has to offer. In the case of two legged creatures the 125gr boolit remains a good option for energy transfer and reduced risk of over penetration.  A sampling has been cast and about half are lubed and sized and loaded with 2400 in the 357 cases. I'll ladder load some others and see about a wet newspaper test.

Tuesday, November 15, 2016

Skinny reload options for the revolver, two revolver reload options for concealed carry.

This past year I have been looking at different options for carrying extra ammo either loose or on speed strips for the 38/357 combo. I thought  I would cover two options I dug out of "misc leather" boxes at gun shows this past year. One is a component for a shoulder holster rig, using either loose rounds or speed strips (.38 spl only with the speed strips too long otherwise).  The other is a old school ammo pouch for a service revolver rig. The black pouch as far as I can tell was intended to hold 6 -.357 or .38 spl rounds loose and then when required the bottom was opened in much the same fashion as the shoulder holster pouch and you caught the loose rounds and fed them as needed. Dexterity under stress being required, I'm not really sure how I like these two options but it does give one options that are much much thinner than speed loader pouches. The speed loader pouches are not bad however I'm looking for more concealed options don't stick out so much from the body.

Belt option and shoulder holster option pictured above. 
                         

I will be repairing the black pouch in short order as some of the stitching has degraded to the point of failure. The nice thing is the black pouch could also easily hold 2-5 round rimfire magazines if one was carrying a mag fed bolt action. Could also hold loose rounds for the lever actions as well as anything else you may want to have you in the city or the woods. The only issue is the bottom opening feature needs to have a very positive snap so you are not losing your goods.


Simple design and won't take long to fix.

Black snaps would attract less attention but with all the cell phone cases out there it wouldn't take much to make this blend in even without an over garment. 

Thursday, September 15, 2016

Introduction to the 310 tong tool: part 3


In the previous two sections we've covered the tong tool handles, the variations and their features as well as the die identification you should be aware of when trying to identify dies that can be successfully used in a 310 tong tool. In this third section we'll briefly cover die set up and adjustment. Please note instructions for the Lyman 310 tool can be found here on Lyman own website as they still produce and support this unique tool. However these instructions are for the 4 die sets, this tutorial will cover 5 die set up procedures.

As I may have mentioned in one of the first 2 sections you will want a dedicated screwdriver that fits the set screws for the lock rings on the 310 dies. They are quite small and some can be quite set deep into the lock-ring depending on the era the dies were made, so it is important to have a hollow ground screwdriver (Chapman makes a nice set) that will not damage the screw or the lock-ring itself.

I will go over how to set up a 5 die set, much the same as the 4 die set in the Lyman instructions but with the sizing/decapping die functions separated into 2 dies.

First step is to decap all your fired cases, select the "universal" decap die and adjust it so that the decap pin sticks out past the handles about about 3/16" ..ish. The important thing is the pin pops the primer out and does not bottom out on the brass or hit the opposing handle (broken pin).

The nice thing is if you have 2 sets of handles and 2 universal decap dies you may set one up for both handles and never worry about having to adjust them again. They will work for all of your 5 die sets! If you have 310 PRESS dies I believe you can take the decapping rod assembly out and use them just like a 5 die set.
De-cap pin stick out, you run the risk of breaking the pin if you have it lower than necessary.


decap brass, note how far the hook extracts the case.


The next step is to size your fired brass. The die for this step in a 5 die set does not have threads on the inside (where a decap stem, seater or expander is typically threaded). A little lube is recommended although I've never used any with my .38/357 pistol set, I can however see the wisdom in the recommendation.

MR die (neck sizing) 


Adjust die until it is sizing the brass as far down as you plan to seat the bullet.
Pro tip- If you have trouble figuring out how far down the sizer is touching the brass it is recommended that you use a sharpie and color the neck then size. Where the die has touched you will see scratches in the sharpie mark. Layout fluid is also an option.

Die has sized brass as far down as I wish to seat the bullet. Note lower ring on neck

Next we set up the priming die, if you need to clean your primer pockets now is the time to do that. To set up the priming die we loosen the thumb nut and adjust the die with the handles closed until #1 the plunger sticks up into where the brass sits by a little bit and #2 the open part of the shell holder faces us. Set up the tool to the "handedness" you will be using it. I use mine in my left hand so I set it up as pictured below.

Priming chamber installed and ready to adjust.


Amount of protrusion we want for the priming plunger with the handles closed. Any more and we will lose the advantage of leverage. 

It is recommended that you practice priming with "dead" primers if this is the first time you have used a hand priming device. Make sure the primer is oriented correctly and gently squeeze, after a few times you will learn the feel of it and know how much pressure to use.

Case being primed, drop a primer atop the plunger and close gently.

Next we will gently expand or "flare" the case mouth if needed. If we have not chamfered the case mouth and we are loading say a boat tail bullet it is recommended we put a slight flair on the mouth to keep from scraping at the bullet jacket. If we are loading cast then we will need to flare to prevent shaving lead while seating cast bullets.
This is the only type of expander die set up that will work with a 310 tong tool 


Die body is threaded in and stem is installed to desired depth, it is recommended to start backed out and turn 1/2 turn in until desired effect is reached.
If you are getting varying degrees of flare at the case mouth you may be needing to trim your brass as it is not uniform between cases. Trimming options will not be covered here at this time but should be in the not so distant future.


Case in flare die as we are loading cast bullets.
Next we select our bullet seating die which also has the option to crimp the bullet in place (you would of course add powder at this step). Just like normal reloading dies it is a good idea to work out your bullet seating depth first and then crimp the bullet in place and adjust the dies accordingly. You do this by starting with the seating stem further in the die body as to bypass the crimp option. Make small adjustments as needed and once the depth is where you want it you can remove the seating stem entirely if you wish.  Now thread the die body in with the handles closed until you feel a little resistance. It is possible to over crimp with these dies so small adjustments go a very long way. After that is all figured out screw the seating stem back in tightly until it touches the loaded round with handles close.


2 seating stems are shown, as often with die sets the stems are for 2 different nose profiles of bullets.
Round nose and spitzer type seating stems are pictured.
Seating die installed in handles  adjusted to seat a flat nose cast bullet.

Though this is a powder-less dummy round for set up it is important to remember that there will be powder in the case and that keeping everything upright to prevent spilled powder is ideal!

Saturday, September 10, 2016

Introduction to the Lyman 310 tong tool: Part 2

In part 1 we looked at the difference and features of the handles that were needed to use the 310 dies. Here in part 2 we see what we need to be looking for in purchasing our tong tool dies either as a group of dies or as individual dies to replace missing dies. As I briefly alluded  the 310 dies come in 2 types, dies intended to be used with the reloading press and dies meant for the tong tools.  It should also be understood that by design the 310 dies are meant to only neck size! There are some full length sizing options out there but those are for the press only. This is fine for bolt actions, single shots and lever actions however most semi auto guns will not like ammo made that have only been neck sized. The die sets you will need for tong tools need to have a "M" type expander, if you have a die set that has the expander AND the decapper in the same die you may run into troubles.

L- 4 die set, R-5 die set


Four die sets have the neck sizer and the decapper in the same die (seen in following pictures). This is fine as it is only the sets that decap and bell or have the button sizer that is drawn back through the neck that you will need to avoid. It is because the hook does not stay engaged with the case long enough to pull it back over that expander. As such either of the die sets pictured above are suitable for the tong tools.

Aforementioned hook shows just how far it will extract a 30/06 case before it disengages. 

4 die set, note left die is both decapper and neck sizer  as opposed to being 2 dies in 5 die sets

5 die sets, The "Universal" type decapping die and then the "muzzle resizer" which is the neck sizer are the left most 2 dies.
 Something to note in the above picture the "Universal" type decapping die assembly is one give away you may be looking at a 5 die set for the tong tool. Most die sets for use in the reloading press set ups will have a skinny stem with a button part way up the stem, note the fatter threaded rod in the "universal" decap die.
Another view of decap/sizer die from 4 die set and the 2 dies that perform the same operation from 5 die set.
In the pictures below we start to take a look at the expander dies as another way to identify die sets for use with the 310 tong tool. If the die set you are looking at combines these two operations into one die it is not for the tong tool but for the press.

Here we see the "universal" decap stems from 2 rifle die sets as well as the "M" type expander die.

These expander dies were taking from 3 different sets, 30/06, 30-30 and 357. Note die body length difference between the three.

Close up of expander die body and stem from 30-30 die set.
 In the next picture we see the decap, sizing and expanding operation combined all into one die. This die as is will not work with the tong tool handles. You could remove the expander button however you'll still need a way to expand the case mouth.

This die intended for the 310 series of bench presses WILL NOT work for our tong tool handles!

Left-310 dies for expanding case mouth and decapping. R- die for the press that combines these operations.

Differences in stem sizes, Also note on right die "CMR" stamp that denotes this as a "combination muzzle re-sizer die"
Another clue you might be looking at a 310 tong tool die set is the priming unit  that has a built in shell holder and captive plunger assembly but it is not a absolute as this was something that could also be used on the press. The bullet seater die (double adjustment) is the same so far as I understand it between the press dies and the tong toll type dies. I mentioned the bullet seater as having double adjustments because the stem is threaded as well. I have yet to see a non adjustable type bullet seater however I'm sure they are out there.

Priming unit shown as 2nd die from left and double adjustable bullet seating die shown far right

This may seem confusing at first (I sure was) but it is worth understanding if your wanting to build a reloading set up that takes up very little space and is easy to use. The 310 tong tool is still a relevant system perfect for the RV or cabin. In the next  part we will go over die adjustments and set up for reloading.

Friday, September 9, 2016

Introduction to the Lyman 310 tong tool: Part 1

Last June I wrote an article on making a simple powder dipper for a "project" and it wasn't until recently I realized that I never explained the project further. This last year I've been living in a very small space while preparing to move yet again. The project was a complete reloading set up I could fit in a small tool box, I had reviewed a lee whack-a-mole type reloader and this was indeed one option for such a set up however... The room I was staying in was in a house with about 10 other people. The whack-a-mole was not going to work (hint it makes a lot of noise unless you have a heavy block to use under it). The next option I had I came across by accident. Lyman 310 tong tools...something I've seen but never really looked into.  I happened to obtain a set of the tongs with a few dies from an estate purchase I had made earlier in the year. I liked the theory behind the tool and thought it would work out very well for what I had in mind. The room I was staying in was about 10'x6' give or take so not even a true reloading bench was possible. I did however have a small computer desk as a multi function surface...dining table, reloading bench, computer desk, writing desk etc.  This gave me enough space for a powder scale, reloading block and misc accessories.

The 310 tool gets its model number from the combination of the "Ideal #3" tool and the "Ideal #10" tool. I am not going to present much info on the rarity or collectible value of the plethora of iterations these types tools have had since their inception rather this is meant to be a practical introduction to somebody who wants to get one of these unique loading tools for themselves. And some things to watch out for along the road to building your micro reloading kit. Note if you are looking at a die set to purchase you may want to skip to part 2 to gain a understanding of what to look for in purchasing your 310 tong tool dies.

#1.Handles a.k.a tongs, pliers, nutcrackers.....

Two types of "modern" 310 tongs. Large/rifle type on the left, small/pistol type on the right.
First you will need to decide what caliber you will be reloading for as your handle selection will be based on this. Above you can see the Lyman 310 large handle (left) and small handle (right). I desired to load .38spl and .357 magnum so a small handle is what the dies I were to be using required. The handles themselves have some important features that make it a truly versatile tool in it of itself.

First feature you might notice is the shell hook, this spring loaded hook acts as an extractor pulling cases out of the dies once you've performed the desired step (bullet seating, decapping, belling, etc.). The hook is adjustable for engagement using the adjusting screw on the other side of the grip. You will need to tune the hook for proper engagement as too much may scrape and damage brass and too little will slip off the case rims.


Side view of hook and adjustment screw 


Loosen nut, adjust as needed, tighten nut.

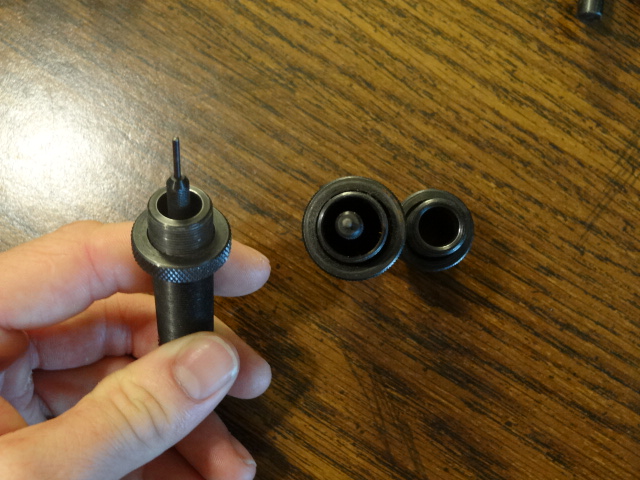
The next feature you will notice is the where the case is inserted for the various operations. There should be a  ring present on any "complete" die set you purchase for tong tool use. These rings are the "shell adapters" each one is stamped with a number that correlates with a cartridge, below we see #1 which is for my beloved 38/357 as well as the #2 which is for 30/06 and 45ACP type cases.


#2 adapter for 30/06, .243, 45acp etc.

Side view of shell adapter needed for tong tools


Threaded shell adapters help align the cartridge cases ensuring accurate introduction to the dies.

It is important to note that 310 reloading dies come in 2 types, the tong tool type that can be used with the aforementioned type handles and the reloading press type. The reloading press dies can not be used with the tool handles successfully, you will run into problems. The biggest issue is with the combination re-sizer die or CMR marked die. More info on this issue will be covered in part 2. 

Wednesday, June 24, 2015

500 S&W / 38 special and 9mm Mihec mold wet pack tests with some 40 S&W thrown in for good measure


Summer range time has been lots of matches (6 or 7 so far?) and a few range work days (with additional range time afterwards). Been developing new loads for some new bullets/guns I've acquired. Enjoy the update as its nice outside and I don't want to be in front of this computer more than I have to be.


I've been shooting my 500 S&W for about a year now and finally got around to testing the bullet I've been casting for it on wet pack (soaked phone books or other such media). Running a load of 14.5gr of Unique under this bullet it leaves the muzzle around 1100fps. I've only been casting with the large HP pins in the mold but after this test I'm curious to see what the smaller pin will do as the bullet did a poor job of holding together, breaking apart at the bottom of the lube groove.

.502 Mihec mold with Large HP pin option


Next is a 125gr cast HP traveling in the mid to upper 900 fps range in a .38 Special case and we see in the following pictures it gave excellent performance!

Fired out of a .38 Special case, wonderful performance.

Side view of  125gr HP fired out of .38 Special

Next are two 180gr bullets fired out of a 40 S&W. One is a premium HP bullet the other is a very cheap plated bullet that shed its plating somewhere downrange or right out of the muzzle? not sure.


Interesting 

premium expanding bullets vs cheap "FMJ" plated job.


Last but not least is my new one and only 9mm mold (which means I need to return the 9mm molds I've been borrowing from my dad). This one is a 125gr mold with various HP pin options like the .38/357 bullet above. This one has a "penta" hp and it does cause the bullet to expand differently. Bullet was traveling around 1025fps. This bullet neutralized a ground hog with a head shot and penetraded almost the full length of its body. Nothing was left of the brain larger than a tic-tac.  I skinned her out but failed to find the pill as it went in regions I didn't feel like cutting into.


Excellent performance from a cast bullet!

Monday, June 1, 2015

More .38 special & .357 Carbine observations: Now with 5" Gp100 and .38 SC loads

As the weather has turned very nice for us here in NW Ohio I've been able to spend more time on the range. In between helping run matches and doing range work I hauled out a chronograph to try a 2nd test batch of hand-loads I cooked up over the winter and late spring.

I shot these loads over two sessions, the first session was mostly handgun work with some carbine thrown in, the second session was mostly carbine with a few out of the revolver for comparison in velocity only.

Toying with multiple bullet weights I'm trying to get an idea what the carbine and revolver like as a combination. The twist rate in the carbine is 1:16 with 1:18 in the 5" GP100 revolver, although it was easy to find the max bullet weight these twist rates would stabilize I was not able to find what minimums were with velocity and weight, something I would have to toy with myself to see how well it shoots in the end anyways. All my cast bullets are straight wheel weights and lubed with the superb Carnuba Red from lars lube . In this test session I was also able to test bullets from my newly arrived 360640 mold a 125-135gr adjustble mold with removable hallow point pins. I cast about 150 bullets with the large HP pins in place and loaded those up.

First off I tried the odd duckling out of the bunch, I had loaded up a small batch of .38 Short colt rounds using the 125gr 360640 HP bullet the day before hitting the range and wanted to see how they shot (and sounded since the other short colt loads I've tried have been louder than expected) I loaded these with 2.0gr of red dot. The only bad thing was that the chronograph didn't want to read ANY of these rounds out of the revolver? probably operator error there.

All testing in both sessions was performed at a mere 50 yards, the 2nd session I scoped the Carbine with a low power scope for giggle. On to the data, we'll go from short colt to special and then magnum data.


  • .38 Short Colt (NOT SPECIAL)- 125gr cast 360640 HP - 2.0gr Red Dot  (shows potential with decent group) 

              77/357- 706,721,743

The above load shows massive efficiency potential if proven in further accuracy testing if you ask me


  • .38 Special- 75gr cast wadcutter-3.0gr of Bullseye
          GP100 5"-604,649,672

The above caught my attention as these loads were all assembled at the same time and the fact the velocity kept going up is something that I need to test again. The light 75gr pill might not give enough resistance for super consistent ignition in such a large bore? However 2 of the shots were touching at 50 yards with the 3rd only a few inches away. However the entire group was about 18" under the bull which isn't surprising really looking at the velocity and figuring drop at 50 yards.
  • .38 Special -125gr cast 360640 HP- 4.0gr red dot 
           77/357- 1126,1074,1117
           Gp-100 5"- 903,888,872

Nothing really jumped out with the above load,  I'll have to compare this load with my staple 158gr lee SWC over 4.2gr of red dot as I seem to remember I was getting almost 1000fps out of that load in a 4" barreled smith I would have expected at least upper 900's out of a 5" barrel with 4.0gr of red dot and a lighter bullet but then again this is part of learning.


  • .38 Special -173gr Keith - 5gr of Unique 
            77/357-1097,1088, did not capture 3rd shot
            GP100 5"-919, 871,910

This load shows a lot of potential in both guns, a heavy 173gr bullet moving at moderate speeds seems to always be the answer, although not that much gain in the carbine over the revolver...fast powder does that I've learned. Accuracy was definitely noted with this load.


  • .38 Special- 148gr SPEER factory wadcutter- 2.7gr of Bullseye
           GP100-658,659,625

This "target" load is a staple of many bullseye shooters it seems like and with loads going up to just above 3.0gr of Bullseye there is some velocity to be gained but there really isn't a need when just punching paper. This load is a good place to start when looking for accuracy performance out of a gun. This load shot well in the carbine in previous tests and achieved 750+fps as I stated in the previous "observations" post.


  • .357 Magnum 125gr cast 360640 HP-15.0gr of 2400
          77/357 1749,1862,1780
          GP100 5"-1139,1352, did not capture 3rd shot - Erratic velocities between 1 and 2?


The above was a mild .357 load, was just a starting point to move up from I may revisit this load again and move down from it to see what happens to group size.

  • .357 Magnum 125gr cast 360640 HP- 16.5gr of 2400 Win primers
          77/357-1885,1904,1943
          Gp100- 1303,1403

  • .357 Magnum 125gr cast 360640 HP- 16.5gr of 2400 CCI primers

          77/357-1949,1915,1952
          GP100-1333,1332

The above I shot in the rifle alternating primers between shots It seems like the CCI may be a little more consistent with 2400 in both the carbine and revolver. From here the primers looked good and I felt ok moving on to 17.0gr of 2400 which was still 2.5gr under "max" in one of my books.


  • .357 magnum 125gr cast 360640 HP- 17.0gr of 2400
           77/357-1978,1981,2008 (WOW)
           GP100-1403,1443 (no real flash compared to sim loads with jacketed bullets)

I was impressed when I saw the 2008 fps show up on the screen, though its of no real practical value its interesting to note that one can get into the upper 1900's with a pistol caliber carbine. Hitting the bullet energy calculator filling in 1990 for the velocity thats giving us just over 1100 ft-lbs of energy at the muzzle.


  • .357 Magnum 125gr Jacketed HP- 16.5gr of 2400
            77/357-1888,1888 with confirmed duplicate
            GP100-1285,1274

The above seem VERY consistent in initial testing and its interesting to note here that the handgun velocity as well as rifle velocity was slightly lower with the jacketed bullet than with cast (lead is a natural lubricant...even if it sticks to barrels sometimes)


  • .357 Magnum 160gr Cast Wadcutter -12.0gr of 2400
           77/357-crap I forgot to write these down
           GP100-1130,1111,1140

This heavy wadcutter load showed potential in both carbine and revolver. I like the idea of a wadcutter as a hunting bullet


  • .357 Magnum 173gr Kieth SWC -12gr 2400
          GP100 5"- 1132,1142

  • .357 Magnum 173gr Kieth SWC- 12.5gr 2400
          GP100 5"-1142,1136,1077 

The 2nd load of .357 mag with the 173gr bullet and 2400 had no appreciable gain in velocity in the revolver although if fired in the carbine (didn't load enough ammo for that) it might have shown a little more velocity.

  • .357 Magnum 92Gr RN cast 14.0gr of 2400
           77/357-1727- ( I only fired one round over the chrono out of curiosity, solid round nose bullets don't excite me but I was curious what the little pill would do) 
           GP100-1207,1274,1042

  • .357 Magnum 148gr Speer wadcutter 5.5gr bullseye
           77/357-1321,1293 (Very accurate with following shots on target)
           GP100-1050,1083,1224 (erratic ?)

  • .357 Magnum 158gr Lee SWC 6.5gr unique
           77/357-1656,1570 
           GP100-1259,1308,1226 
          
The above load with 6.5gr unique and the 158gr Lee SWC showed some promise to being a good load in both the revolver and the carbine. This 158gr bullet as I may have mentioned before is one of my favorite bullets for the .38/.357.
       

Some might be annoyed that I didn't go on about what was accurate and what wasn't but this is just a starting place for me to work from. I took further notes on accuracy but nothing was super stellar enough to be passed along, more so I thought the velocity readings were more interesting as from that we can calculate energy....something that we want to know if going afield.


Saturday, May 16, 2015

.38 Short Colt....again

Having shot up my small supply of 3.5gr red dot under the 92gr round nose bullet I loaded some more primed cases with 1 grain less...2.5gr of red dot. The results were the same it seemed in report at least, I think I'll start to move away from the light 92gr bullet as moving to a heavier bullet will give me less of a report. I have access to a noise dosimeter and may include that along with a chronograph in the next extensive testing day I have at the range. Just for kicks I'm curious how these loads compare with similarly loaded full length .38 Special loads as the load density (or amount of air space left in the case after bullet has been seated) is significantly lower. The 92gr round nose were what I had on hand really for initial testing and I feel comfortable moving to a heavier bullet (105gr Lee or heavier as previously mentioned) The short colt although loaded with a heavier bullet might be made to the same OAL as a .38 special loaded flush with a wadcutter, something I happened to notice that somebody else pointed out on another forum when researching this round.

The accuracy with these loads has been "ok" nothing stellar and nothing tested over 25 yards as the drop is significant past that distance, a quick guess on the ballistic calculator has it dropping over 36" at 100 yards if its clocking around 600 fps and a mere 24" if its getting 750 fps out of the muzzle.

Closing thought, check the chamber for leading build up just like you would with .38 special and check back for more info.

Sunday, April 26, 2015

A preface to my.38 Short Colt idea


Being a re-loader and a tinkerer one tends to look at how to get more versatility out of the tools he has at his disposal (even if there is no REAL need). Now there is nothing wrong with light .38 special loads, a light load of bullseye and a just about any bullet will give you surprisingly good performance out of a revolver or a carbine (bolt action, lever or single shot). But as we all know you have to experiment and see what else is out there and when looking at light loads for the .38 special the .38 short colt came up. It turns out shooters who get their .38/357 wheel guns cut for moon clips will use the .38 short colt in them as they load into the gun easier. Not something we're really worried about here, this is mostly just a educational venture but still fun. The .38 short colt is a case roughly the same length as the 9mm Luger, the similarities are very close except for the rim.  Most shooters are familiar with being able to shoot 38 special in a .357 magnum but few are familiar with the .38 short colt and .38 long colt being compatible in these guns as well, and for good reason. Both are obsolete except in specialized guns and the competitions those guns are used in.  My interest in the cartridge lies strictly with its physical characteristics. My thinking is the short stubby case takes up less room than a standard .38 special case (in a stock pouch like what I've put on my 77/357). I can also at a glance discern a light load from a magnum load. This is all theory right now of course, but it looks good on paper. I can carry one of my 5 round rotary magazines loaded with the .38 short colt loads and one with .357 magnum hot to trot loads. This could be the best of both worlds but only testing will tell. 


Its pretty obvious which magazine holds the light load and which holds the heavy one.

I decided to make 50 .38 Short colt cases out of .38 special brass just to try as a comparison to .38 special loads.  I'll post pictures of how I made the brass later but the use of a mini chop saw, a trimmer and a deburr tool is paramount to stress free case modifications. I've done the tubing cutter thing in the past and it was a lot of 4 letter and $1 words.
.38 Short Colt loads are not that easy to come by however it seems several people recommend using reduced 9mm cast loads as starting points so that is what I decided to go with. As the case has roughly the same dimensions  same  Going to my Lyman cast bullet book I decided to try a load of  3.5gr of Red dot under a ~92gr round nose. Round nose bullets are not what I would use "out in the wild" as they tend to over penetrate and not disperse there energy effectively. I plan on using a 105gr Lee semi wad cutter after I get a sampling of bullets cast, sized and lubed. For now I'll just play around with the 92gr round nose and see what kind of results I get with it. 


.38 Short colt brass and loaded cartridges made from .38 Special cases